The introduction of new token standards and platforms has opened up exciting possibilities for developers and businesses alike. One such token standard is the ERC-3643, an identity-based token system that focuses on investor identity rather than wallet address.
In this guide, we will walk you through how to write and deploy an ERC-3643 smart contract using SettleMint's blockchain development platform.
What is ERC-3643?
ERC-3643 is a new token standard that is identity-based rather than wallet address-based. This means that instead of being tied to a specific wallet address, the tokens are tied to an investor's identity. ERC-3643 also includes automated compliance features that ensure transfers only occur if both the investor and offering rules are complied with.
What is SettleMint?
SettleMint is the high-performance, low code blockchain development platform for building, deploying and integrating blockchain applications. With our visual dashboard development approach, minimal coding is required, which reduces the complexity and time required at every stage of the blockchain development process.
Benefits of using SettleMint
- Simplifies the blockchain development process by offering a low-code platform with a visual dashboard development approach.
- Provides comprehensive tooling for enterprise customers, with support for both private and public chains.
- Allows integration between on-chain and off-chain systems through the Integration Studio and the Hasura Engine.
- Offers deployment options on managed cloud services or fully on-prem.
- Reduces the complexity and time required for each step of the blockchain development process, enabling faster time-to-market for blockchain applications.
- Enables developers to focus on building blockchain applications instead of worrying about the underlying infrastructure.
- Provides secure and reliable blockchain solutions for enterprise and public sector organizations.
To deploy an ERC-3643 smart contract using the SettleMint platform, the first step is creating a SettleMint account. When setting up an account for the first time, you become eligible for €250 of free credits that allow you to test the platform.
Follow the steps below to set up your SettleMint account, and then start writing and deploying the ERC-3643 contract.
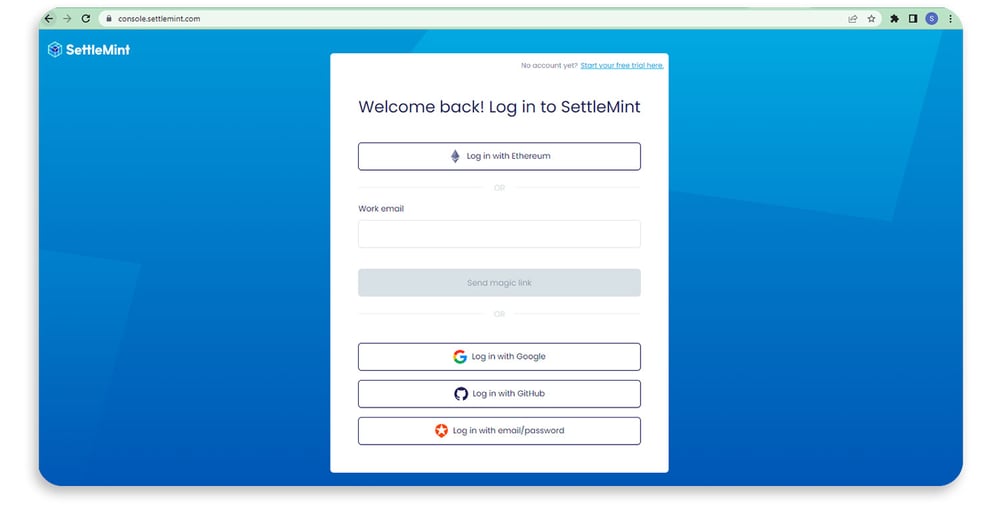
STEP 1: Set up your account
- Log in to the SettleMint platform using your preferred method (cryptowallet, email address or Google Account).
- Complete the account setup process by entering your organization’s name, your first name and your last name.
- Enter your billing credentials (credit or debit card information).
Below are snapshots of these stages.
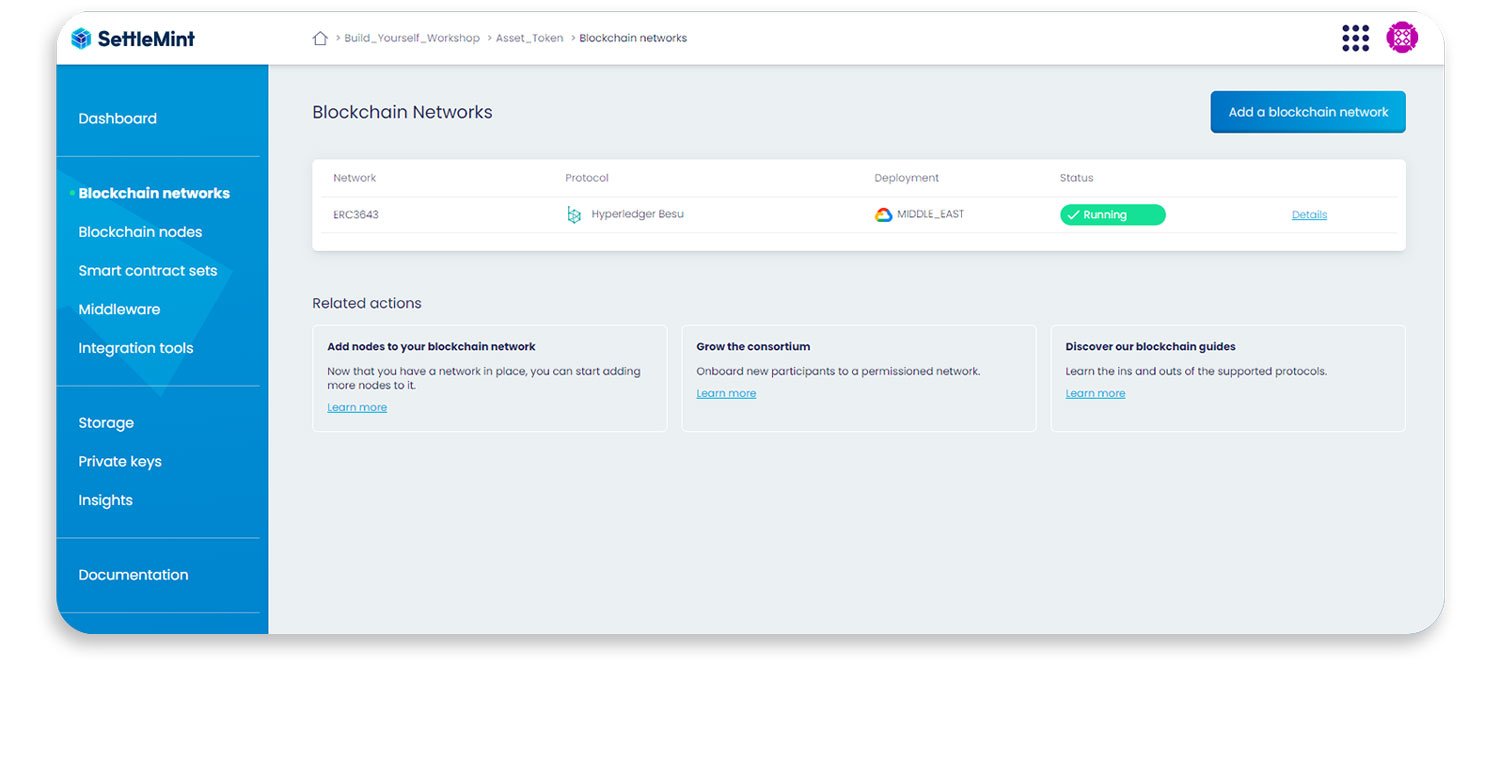
STEP 2: Create a blockchain network
- Choose your desired blockchain network from the available options (e.g., Ethereum, Polygon, Avalanche, Binance Smart Chain, etc.). In this example, we will choose Hyperledger Besu and we are choosing it as a private permissioned network.
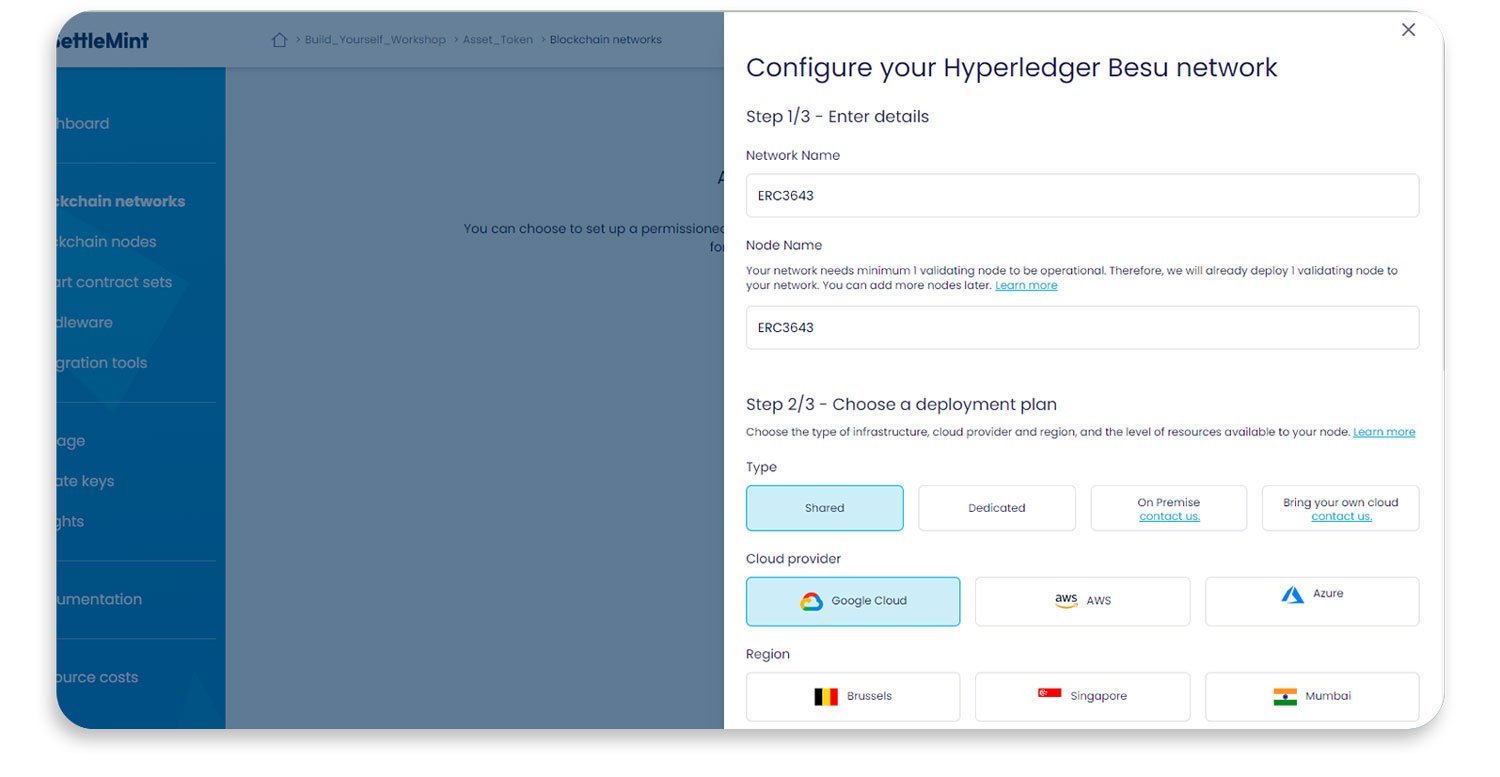
- Create a cloud resource pack for the selected network by providing a title, choosing a server hosting option, selecting a cloud region and picking a server resource pack.
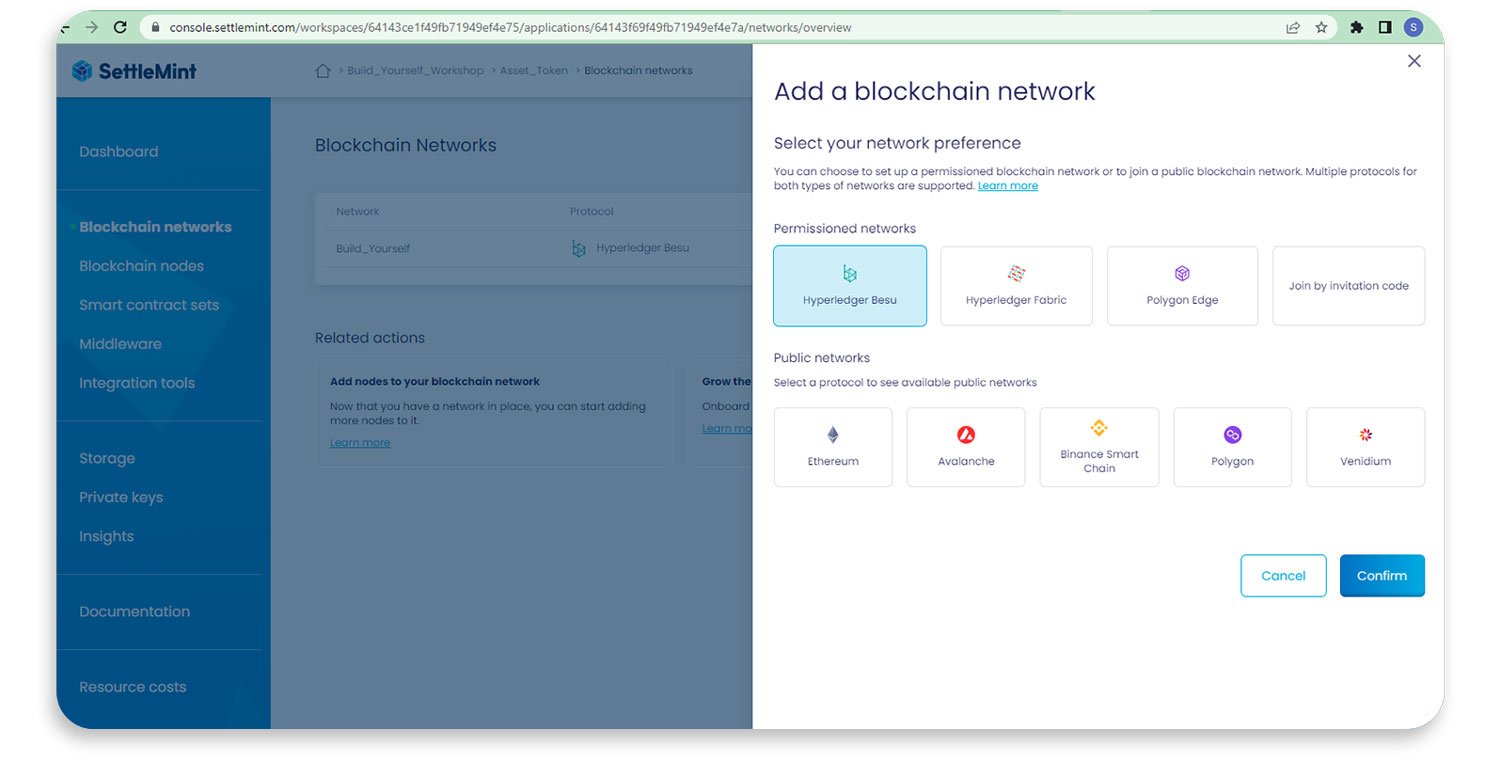
We have chosen the Hyperledger Besu network to deploy an ERC-3643 smart contract. Now we can proceed to choosing a cloud resource pack for the selected network.
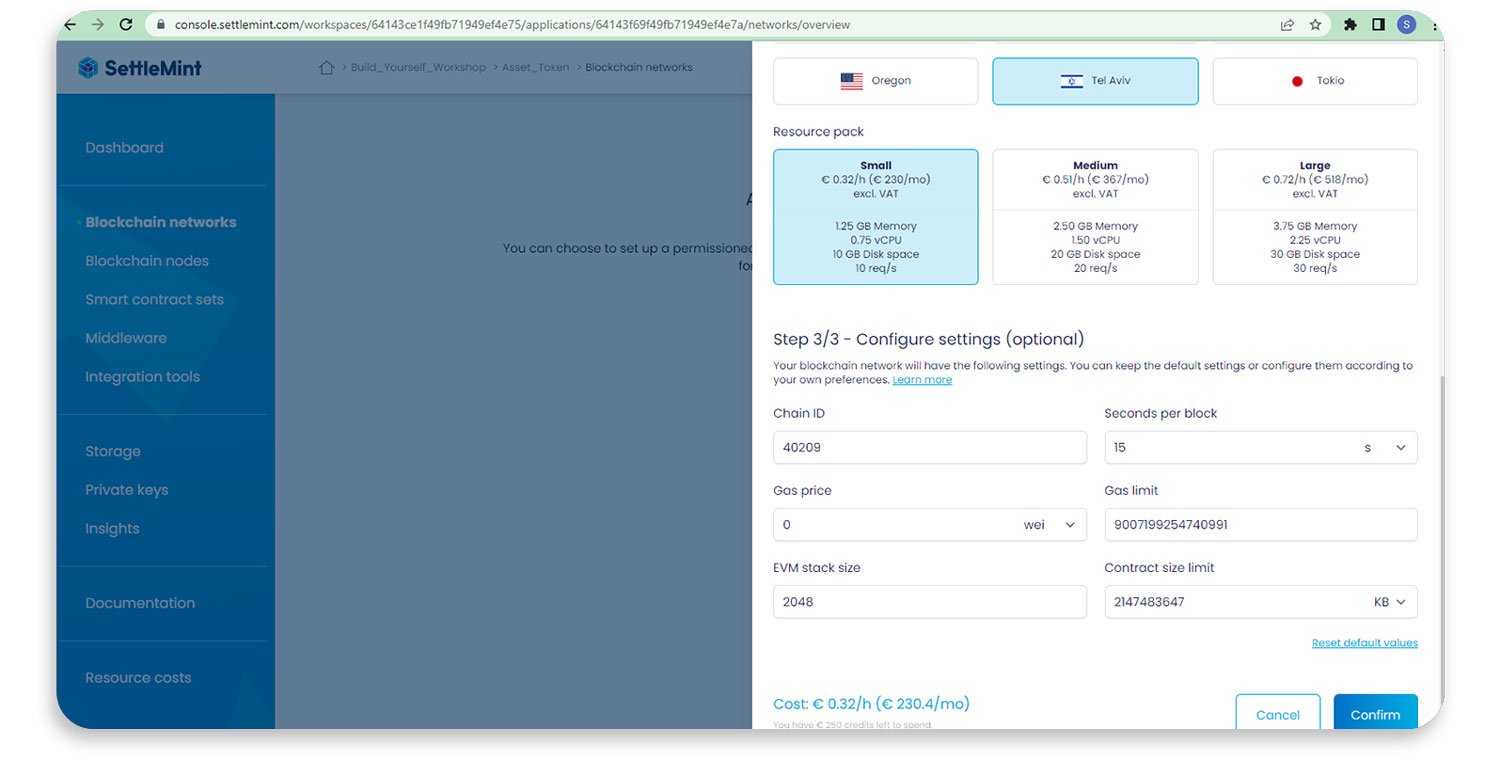
We assign a title to the network’s cloud resource engine, select shared server hosting, choose Google Cloud Brussels as the cloud region to optimize geo-latency and opt for the small option as the server resource pack.
After clicking 'Confirm', the Hyperledger Besu network is created.
STEP 3: Create a blockchain node
Please be aware that when creating a Hyperledger Besu blockchain network, a Besu node component is automatically generated on your behalf. However, if you wish to attach an additional node to this default blockchain node, follow the process outlined below.
- Navigate to the "Blockchain Node" section of the dashboard and click ‘Add Node’.
- Select your previously created blockchain network (e.g., Ethereum Goerli etc.) and proceed.
- Provide a name, deployment cloud resource package details, server type, cloud platform, region, and resource pack for your new node.
- Confirm the creation of your new blockchain node.
- Wait until the deployment is complete and move on to the next step.
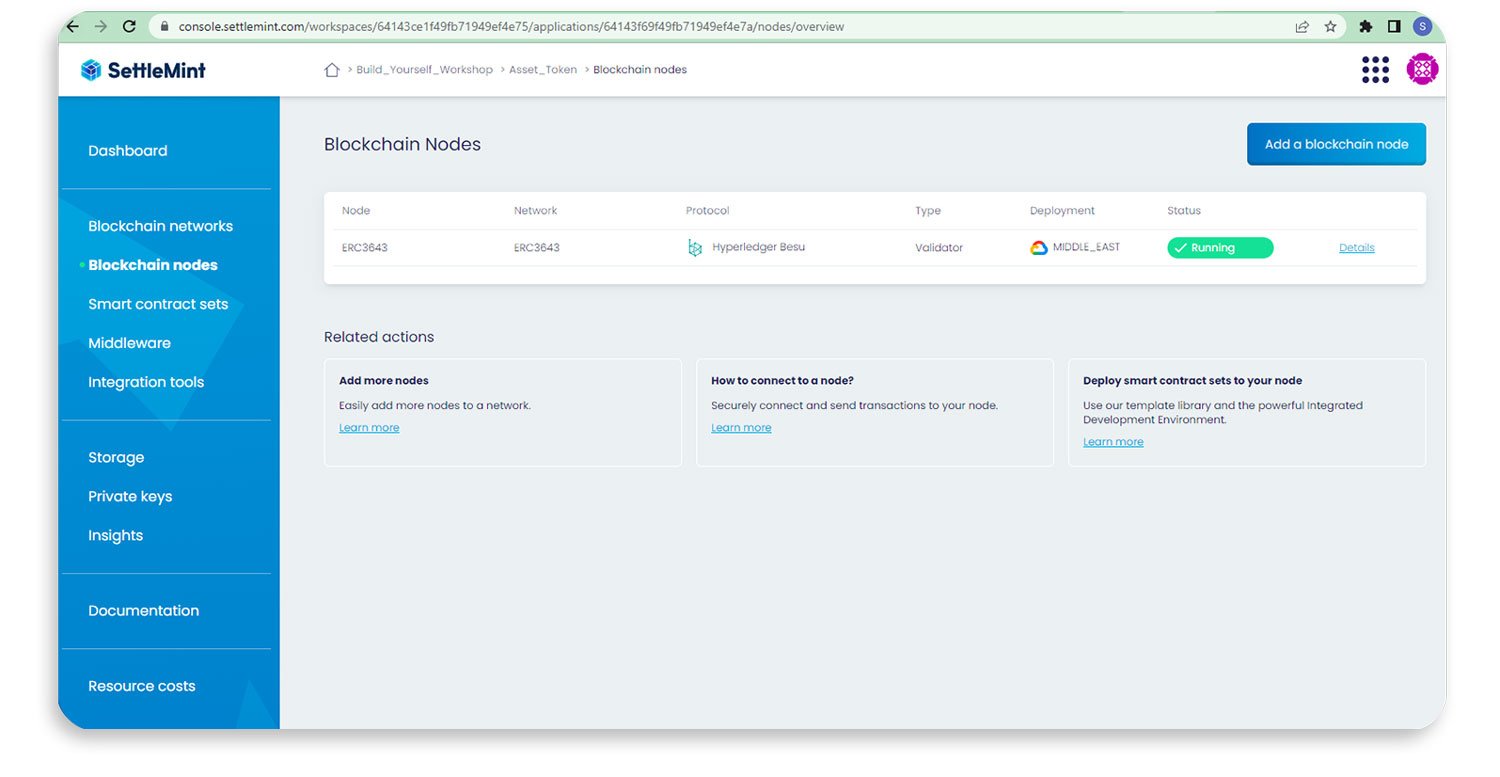
Select all the appropriate cloud resource options and then confirm to create the new node.
This plan involves assigning a name, specifying the deployment cloud resource package details, selecting the server type as ‘shared’, choosing your preferred cloud platform (in this case, ‘GCP’) and picking the region nearest to you. In this example, we are opting for a small resource pack, due to cost considerations and the fact that I'm deploying a simple smart contract on this resource pool.
We’ve now successfully completed the creation of a Hyperledger Besu network with a Besu Node component. We can then start creating the other components needed for the proper deployment of our ERC-3643 smart contract. These are outlined in the next three steps.
STEP 4: Create your IPFS storage
- Navigate to the "Storage" section of the dashboard and click ‘Add Storage’.
- Select the options as required for your project and confirm the creation of your IPFS storage.
- Wait for the deployment to complete.
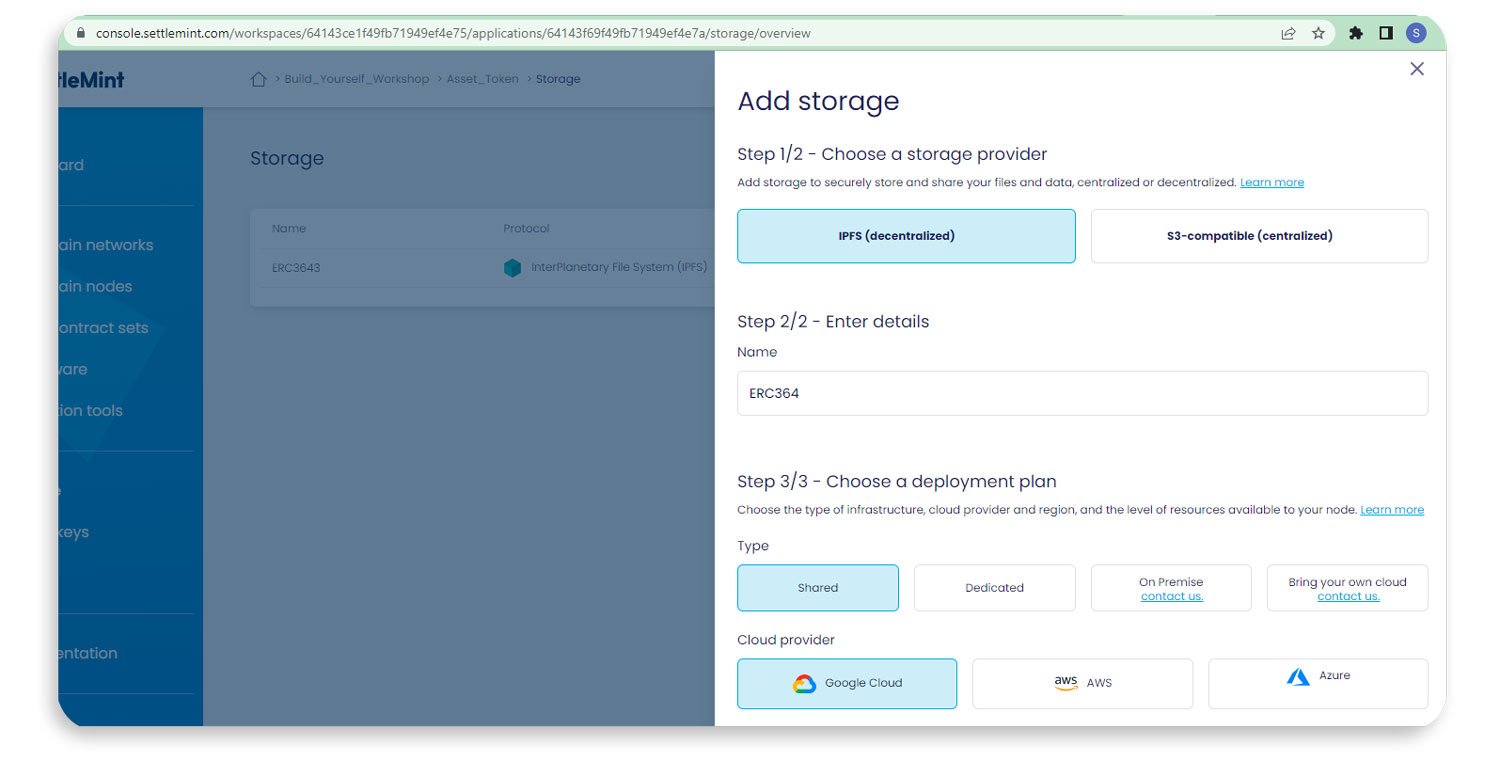
After navigating towards the storage area, click the ‘add storage button’ and select the options below.
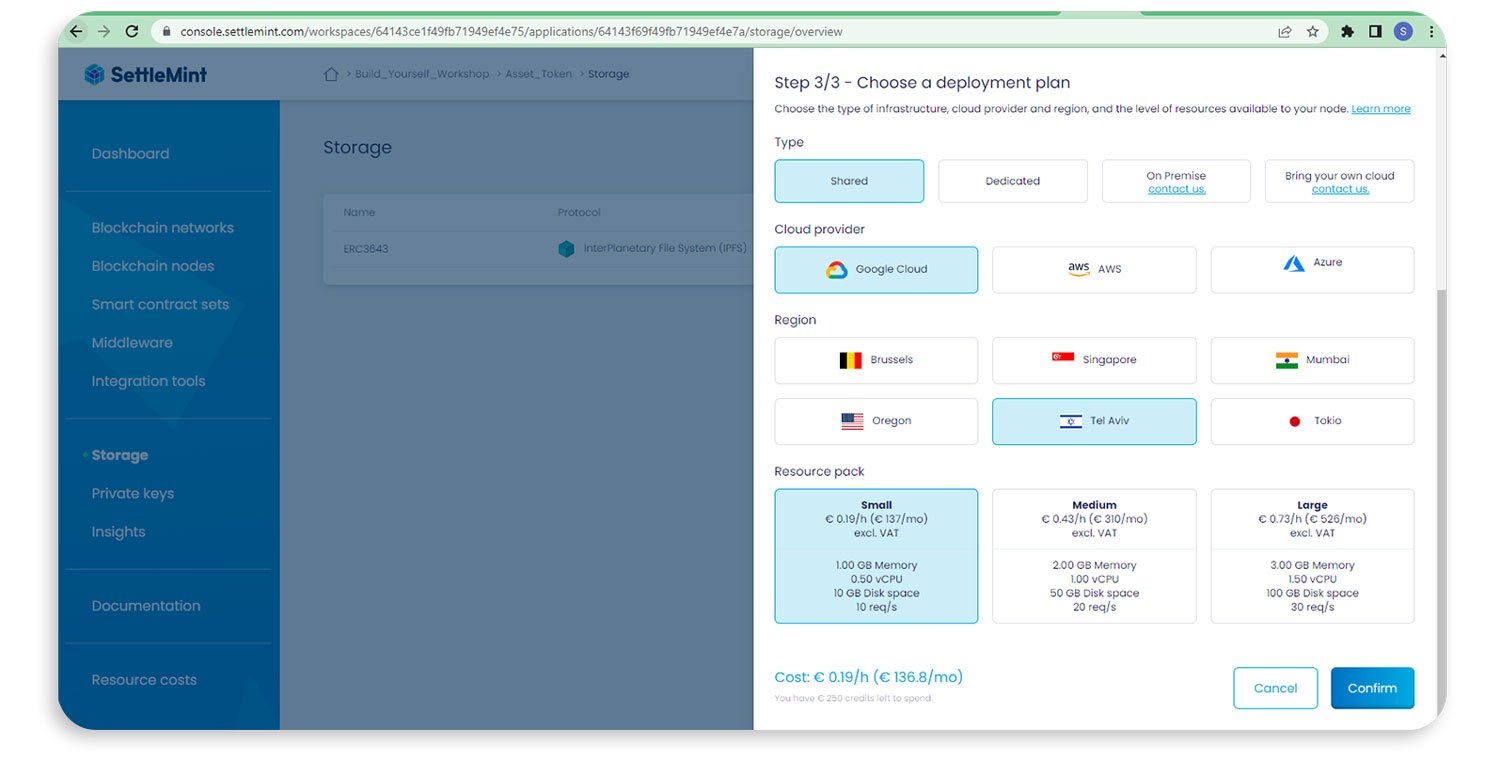
Wait for a maximum of one minute for the deployment to complete.
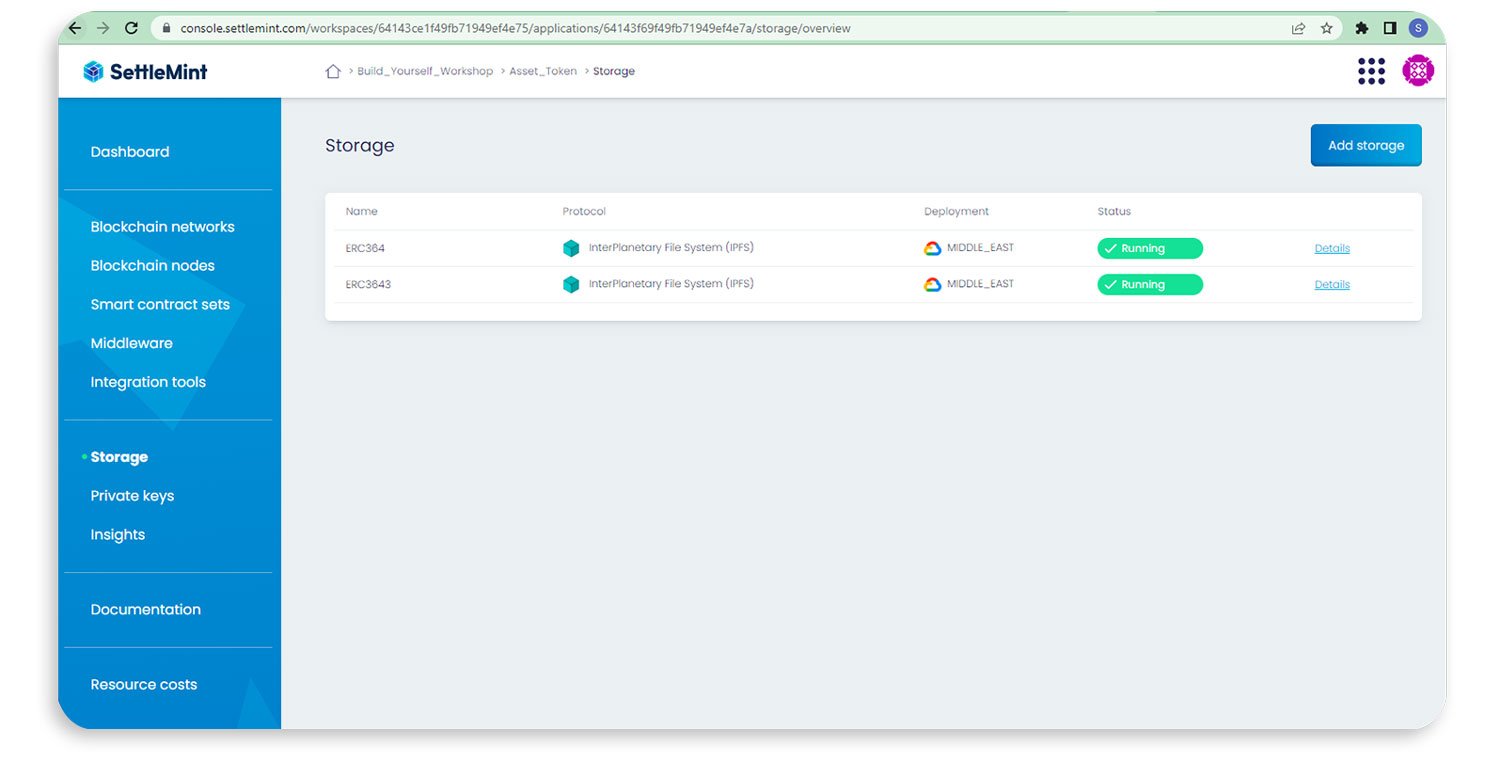
The platform shows you the green check mark after it has been created successfully, so it’s now time to move on to creating the Graph Middleware.
STEP 5: Create The Graph middleware
About The Graph
The Graph is a decentralized protocol and middleware solution designed to simplify the process of querying and retrieving data from blockchain networks, particularly in the context of smart contract development.
By providing an accessible and efficient way to access on-chain data, The Graph empowers developers to build more sophisticated and user-friendly decentralized applications (dApps). One of SettleMint’s key differentiators is the fact it has The Graph as one of the middleware components that developers can use.
How to add The Graph Middleware
- Navigate to the ‘Middleware’ section of the dashboard and click ‘Add Middleware’.
- Select the options as required and confirm the creation of The Graph middleware.
- Wait for the deployment to complete.
Navigate to the Middleware section of the SettleMint IDE dashboard, as shown in the image below. Then proceed by clicking the ‘Add Middleware’ button.
You will then see the following screen after clicking the ‘Add Middleware’ button and you should select the smart contract set to which you want to attach your middleware. For this guide, there is only one set available to choose.
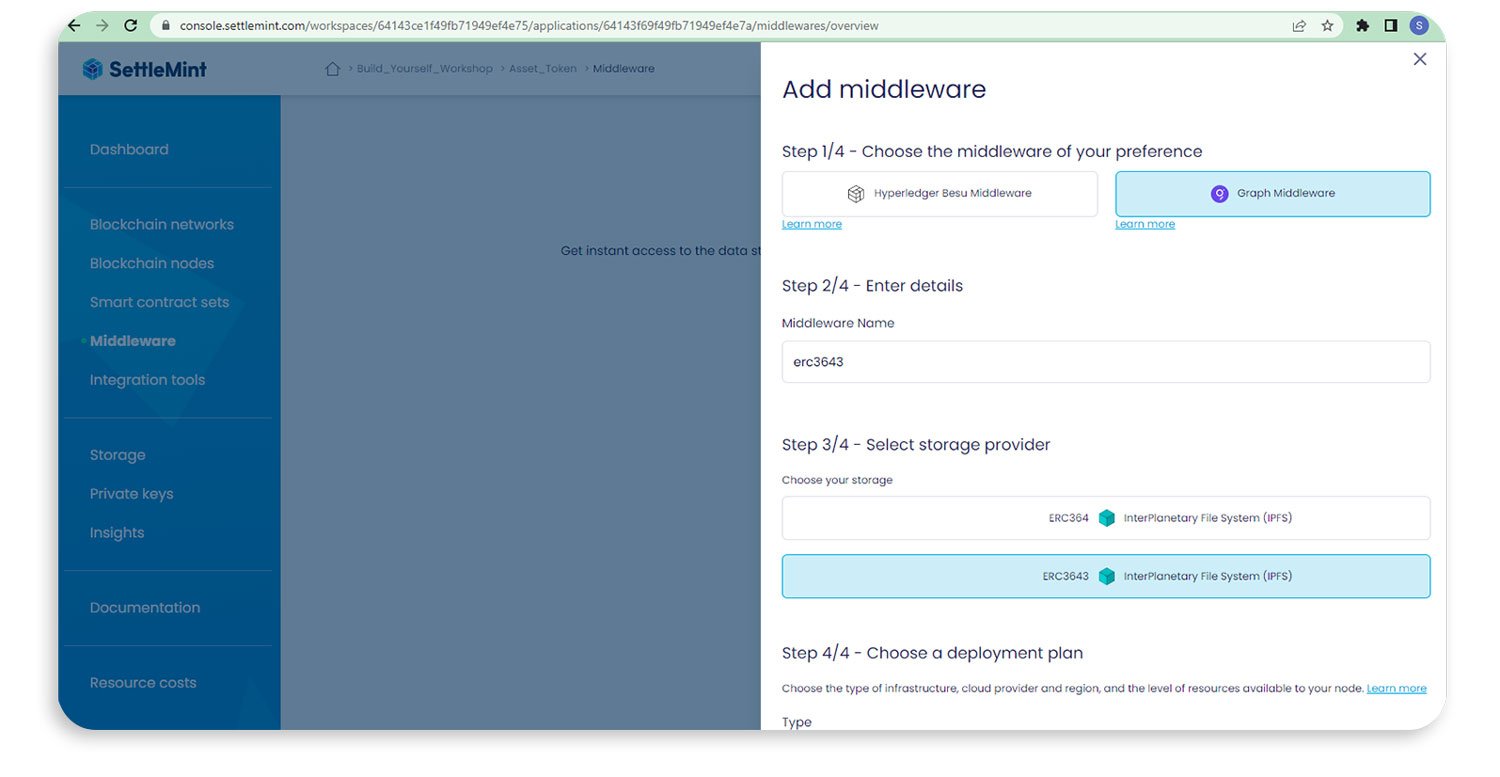
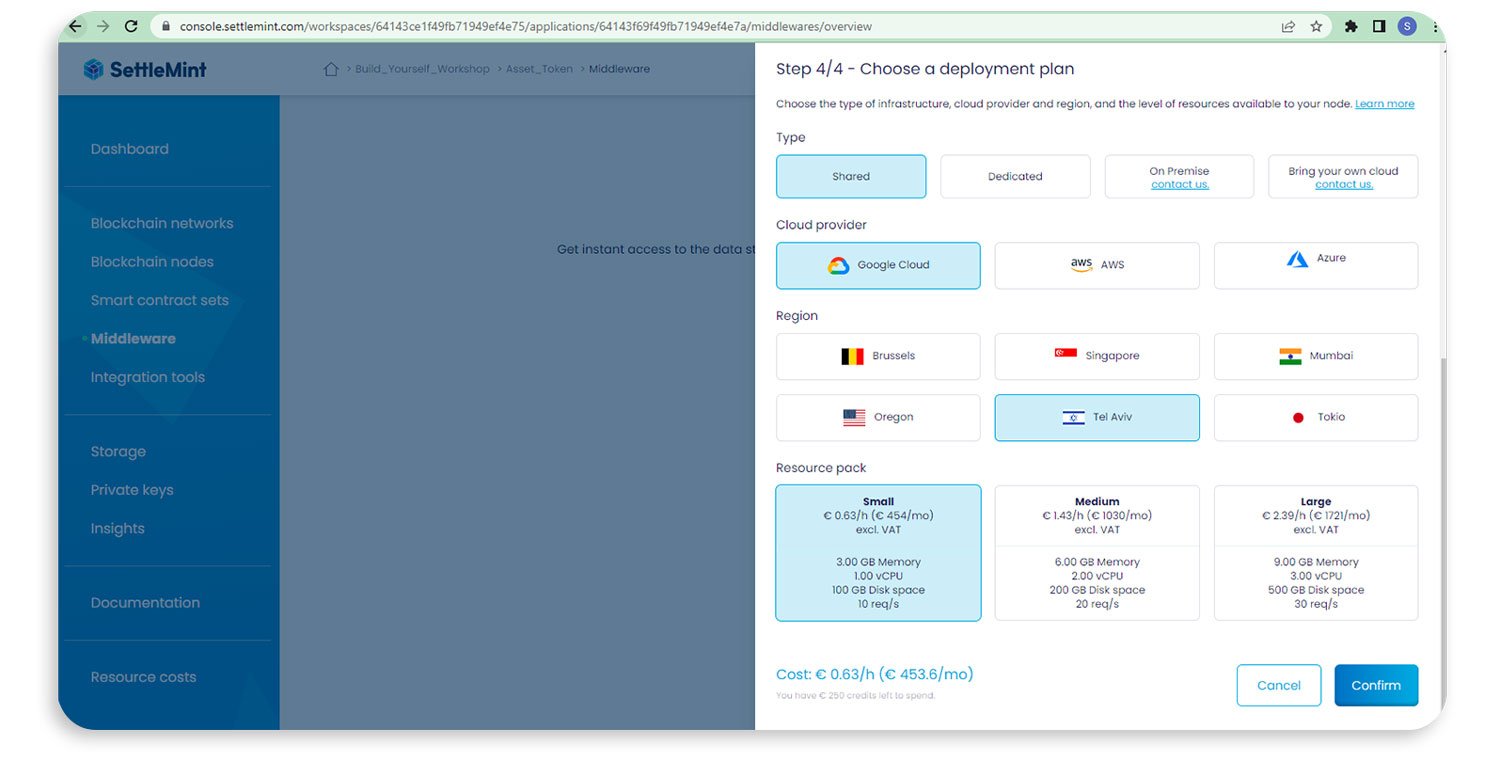
As shown below, you will then need to choose The Graph as your middleware. You will also be asked to name your middleware and to select the cloud resource pool, before confirming your choice of The Graph middleware attached to Hyperledger Besu.
The Graph middleware is now created, as shown in the image below.
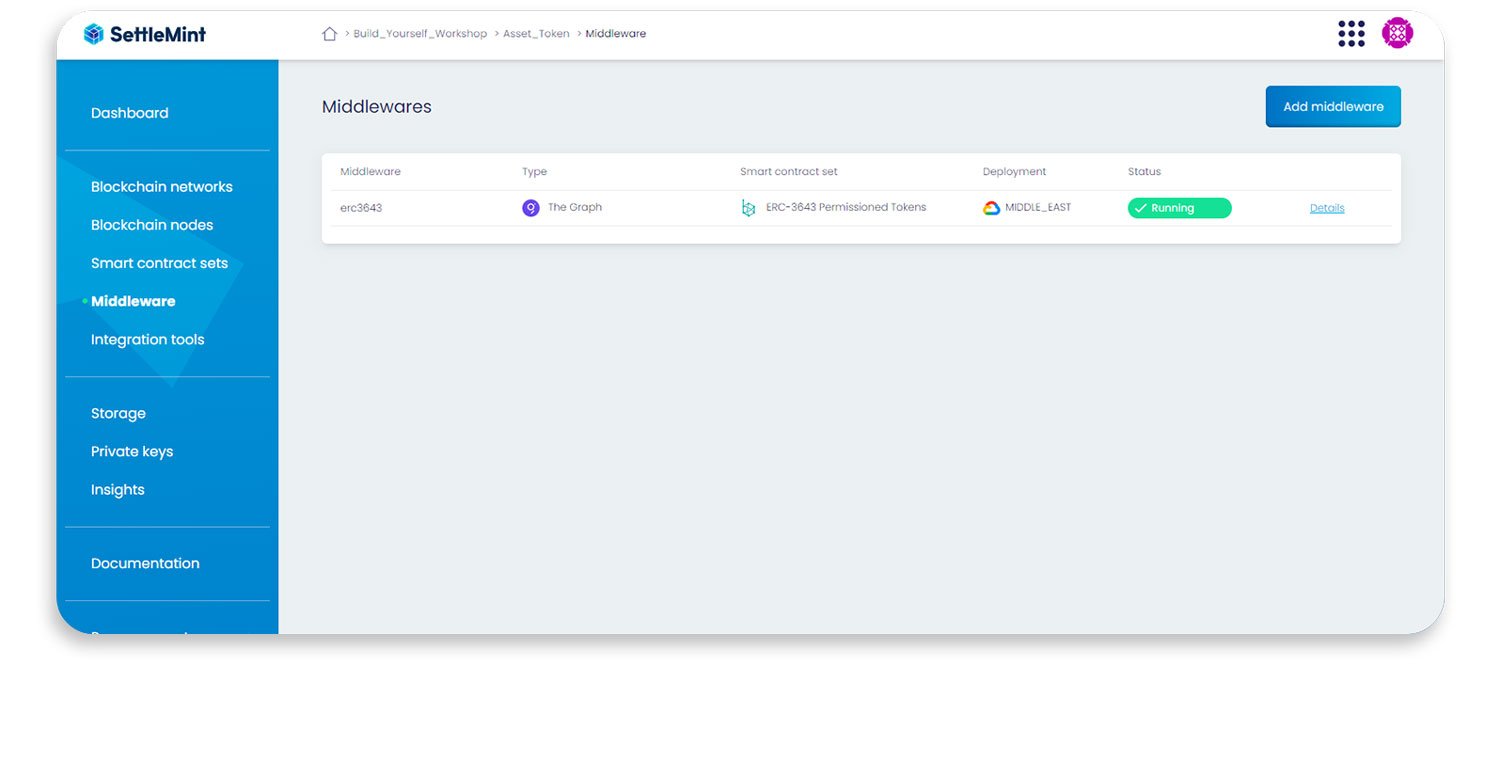 Next, we can move on to creating private keys, creating the ERC-3643 smart contract set and deploying the smart contract.
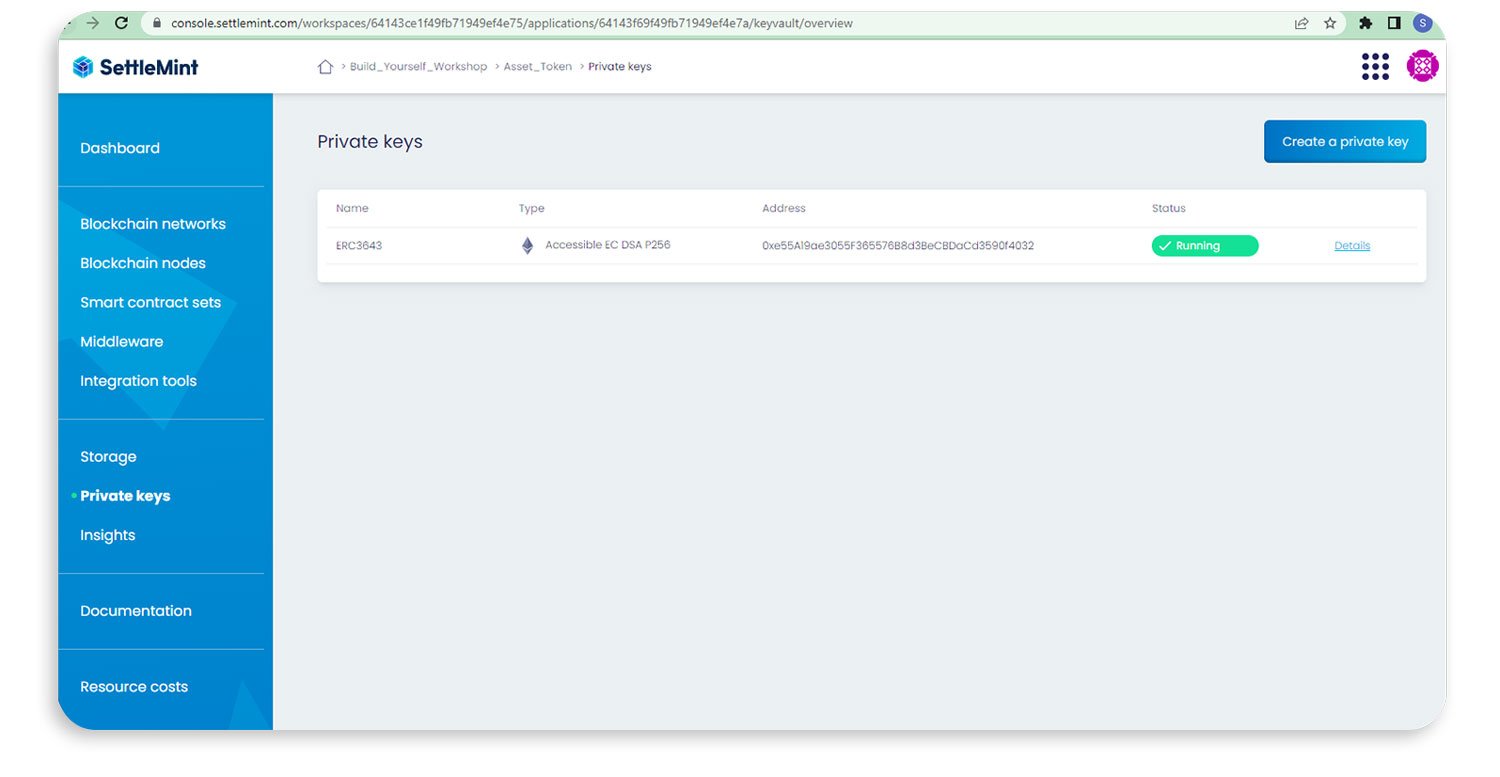
STEP 6: Create private keys
- Navigate to the ‘Private Key’ section of the dashboard and click ‘Add Private Key’.
- Select the options as required for your project and confirm the creation of your private key.
- Wait for the deployment to complete.

After selecting the above resource, click on the ‘Confirm’ button. The private key will go through a 30 second deployment window and then go live.
 Now we move on to the smart contract sets area of the dashboard. This is where the key action is played out.
STEP 7: Create the ERC3643 smart contract set
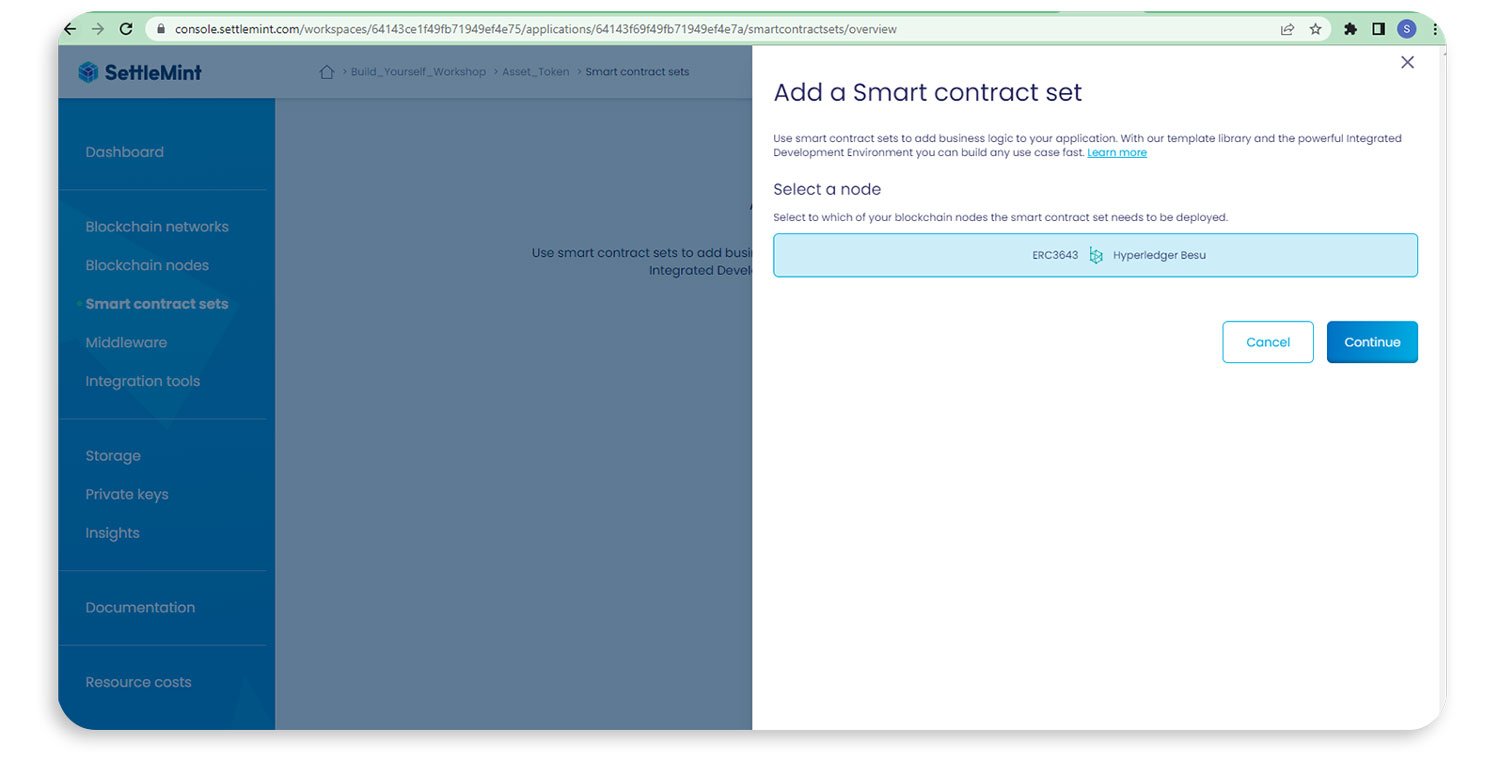
- Navigate to the ‘Smart Contract Set’ section of the dashboard and click ‘Add Smart Contract’.
- Select your previously created blockchain node (e.g., Ethereum Goerli Testnet) and proceed.
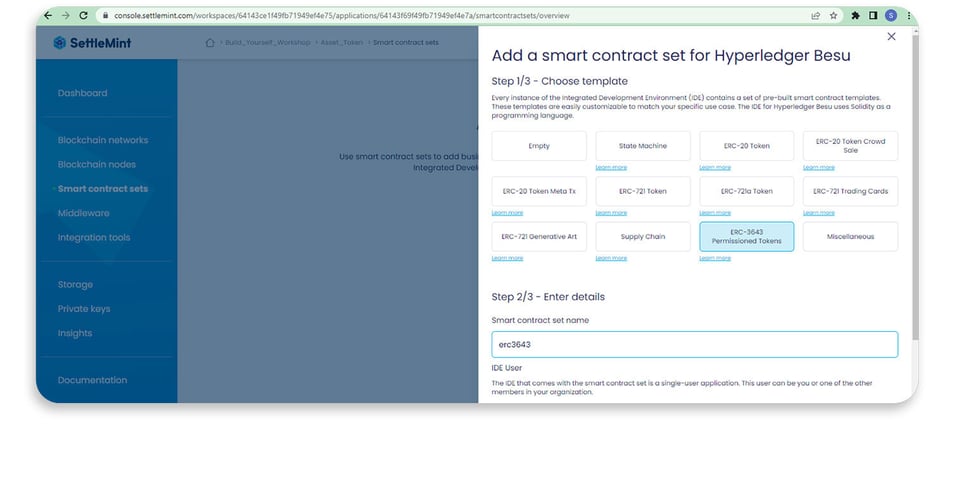
- Search for the ERC-3643 permissioned token contract and select it.
- Provide a unique name for your smart contract and complete the cloud resource pool section.
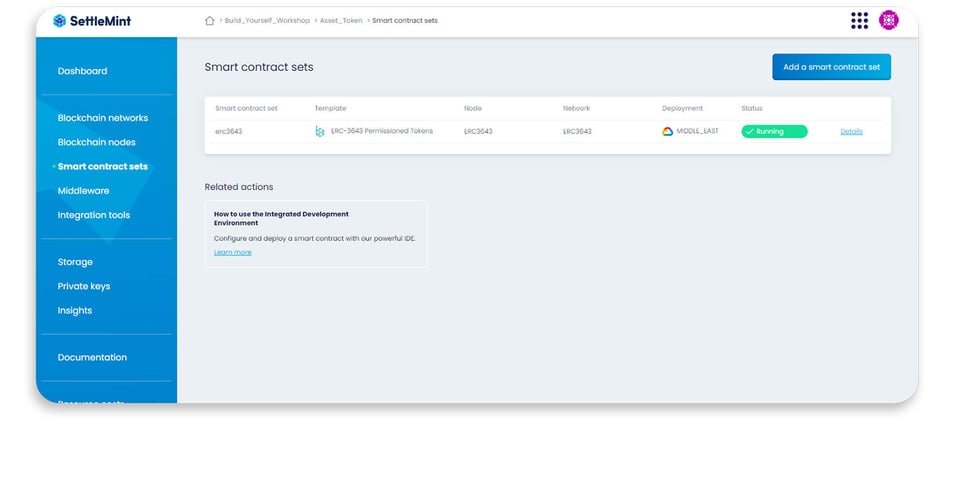
- Confirm the creation of your ERC-3643 smart contract set and wait for the deployment to complete.
Search for the ERC-3643 permission token contract and select it. Give your smart contract a unique name and fill out the cloud resource pool section.
 STEP 8: Deploy and test the ERC-3643 contract via CLI
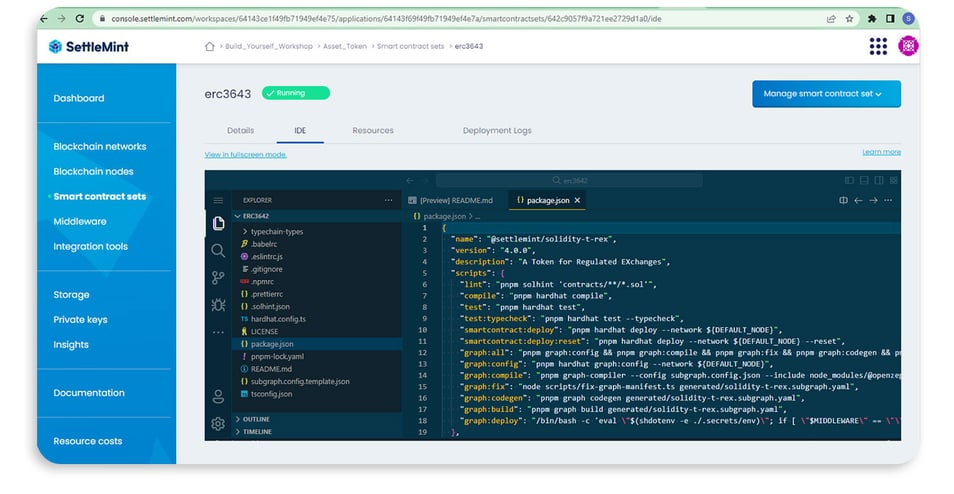
Navigate into the deployed smart contract runtime and go directly into the IDE section.
The platform brings up a VSCode-oriented IDE with a pre-configured ERC-3643 smart contract, as well as other dependency files.
Step 8.1: Navigate to the SettleMint IDE
Open the SettleMint IDE on your system. You'll be greeted by the main interface, which displays your project files and the integrated terminal.
Step 8.2: Compile the Smart Contract
In the SettleMint IDE terminal, run the following command to compile your smart contract:
yarn compile

Wait for the compilation process to complete. If successful, the compiled contract will be available in the 'build' folder.
yarn smartcontract:deploy
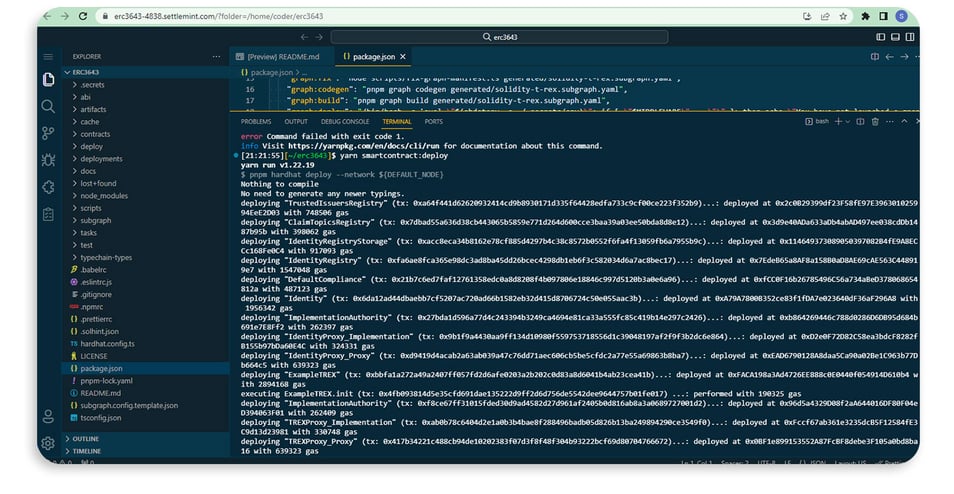
The above is the result of the yarn deploy command. The command was run and below you can see the result of a successful deployment.
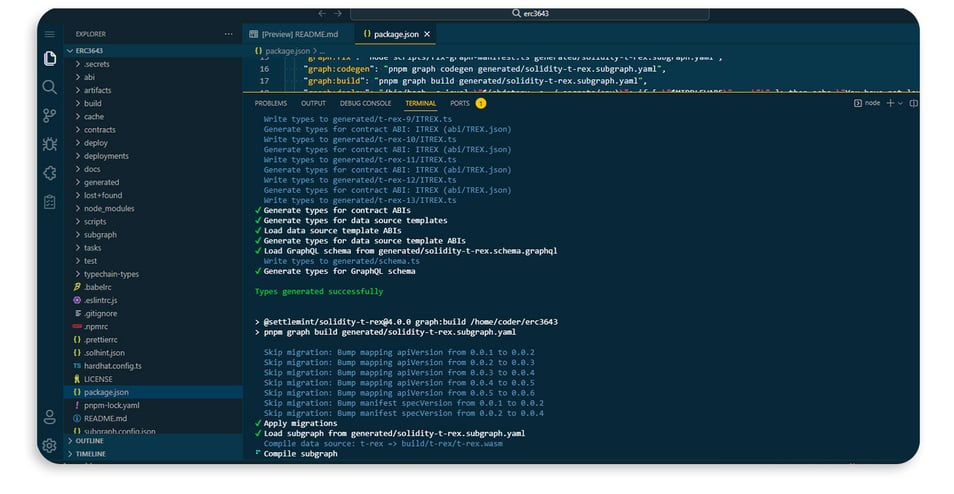
Step 8.3: Deploy Graph Middleware
In the SettleMint IDE terminal, run the following command to deploy the Graph Middleware:
python
yarn graph:all
After running the above command, the following screen displays:
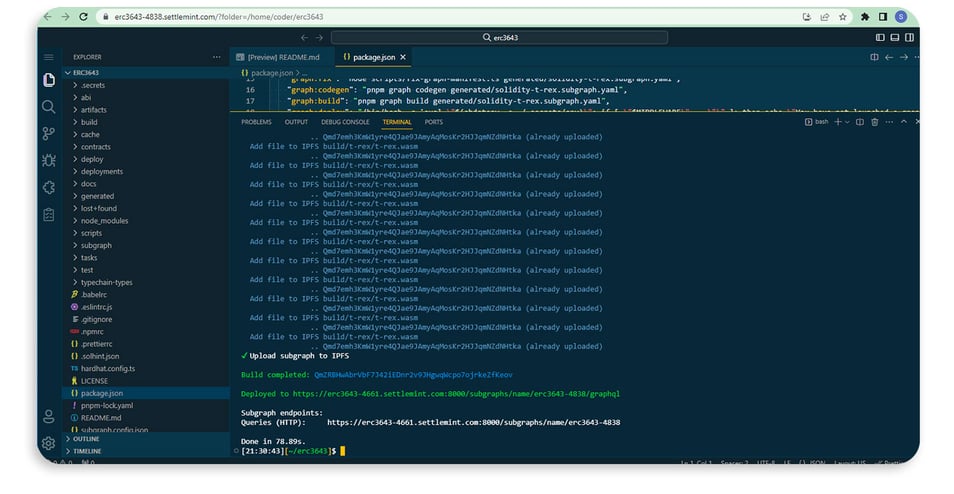 A successful graph middleware deployment is shown.
This command will initialize and deploy the Graph Middleware, which will enable more efficient querying capabilities for your smart contract.
Step 8.4: Test the Smart Contract
In the SettleMint IDE terminal, run the following command to test your smart contract:
bash
yarn test
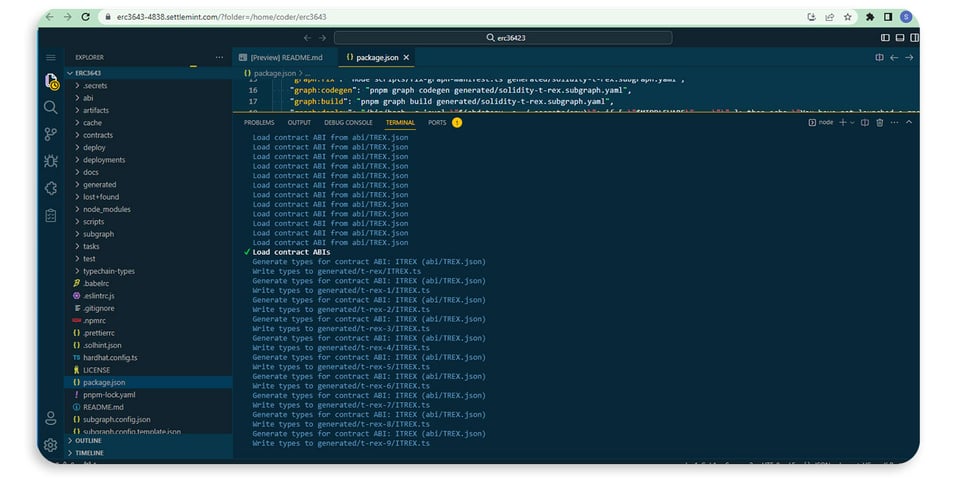 The testing process may take some time. Once completed, you'll see the test results details.
Conclusion
In this guide, we have explored the process of deploying an ERC-3643 identity-based token contract using the SettleMint platform.
The SettleMint platform offers a high-performance, low-code approach to blockchain development, making it easier to write and deploy smart contracts. We have demonstrated the step-by-step process of setting up an account, creating a blockchain network, adding a node, creating IPFS storage, deploying The Graph middleware and generating private keys, before creating and deploying the ERC-3643 smart contract. Finally, we have also shown how to test the smart contract using the SettleMint IDE.
By following this guide, developers can easily deploy ERC-3643 smart contracts and leverage the benefits of SettleMint's platform to create powerful, secure and reliable blockchain applications.